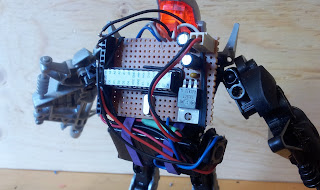
WIP: testing the onboard LEDs
before soldering the PCB
Micro-controllers and electronics are taking over my spare time... did I say spare time? Robots and flashing lights being 'sooOOoo cool', my kids are always coming in to see the crazy things I'm working on and asking half a million questions while working at my side. There's nothing like the hands-on approach.
Some weeks ago, my 6 years old son came to me with his favorite Lego robot and started telling me is plan to put flashing lights in the chest and in the head. He proceeded to show me where the batteries would be and that the [Arduino] chip would be in the middle of robot's back with all the wires going to each parts. He finished by explaining that he wanted to use Mom's hot-glue gun to attach the parts.

google 2414
ReplyDeletegoogle 2415
google 2416
google 2417
google 2418